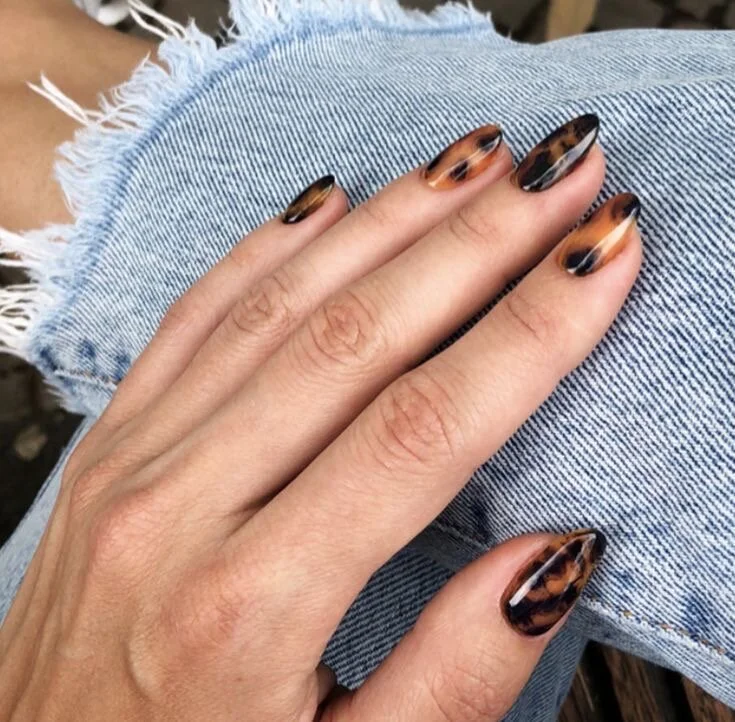
Tortoise Nails At Home, Trend Fall 2020
Tortoiseshell nails are a big hit this Fall 2020, and easy to match with pretty much every autumnal outfit you will put together this season. A mix of warm brown tones and a touch of black is all you need to step up your Fall style.
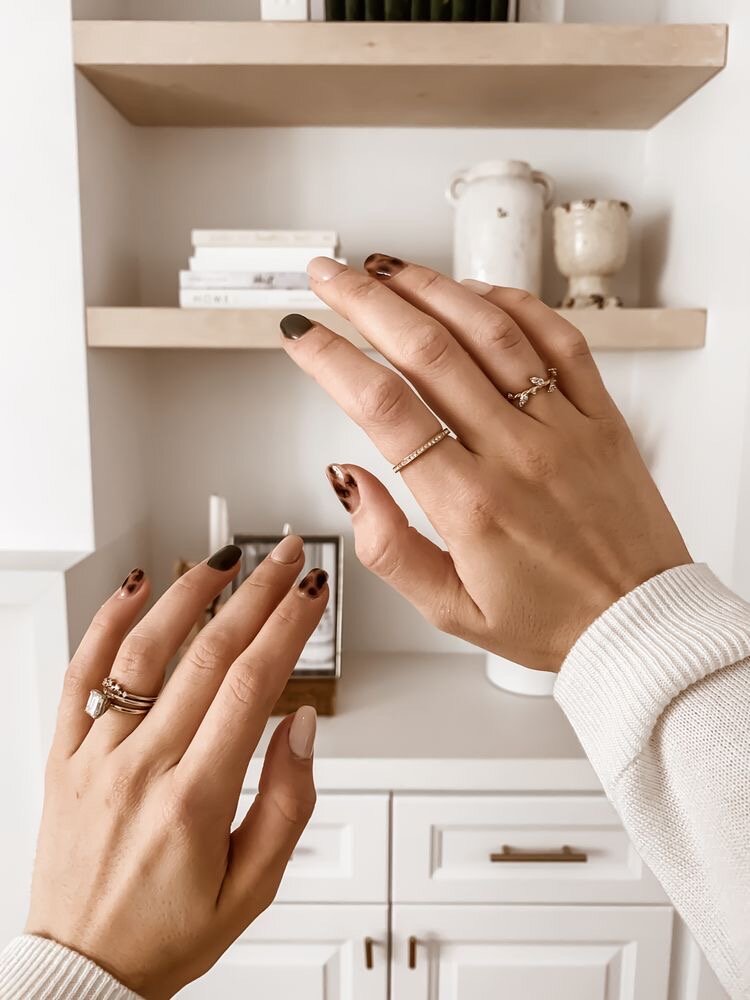
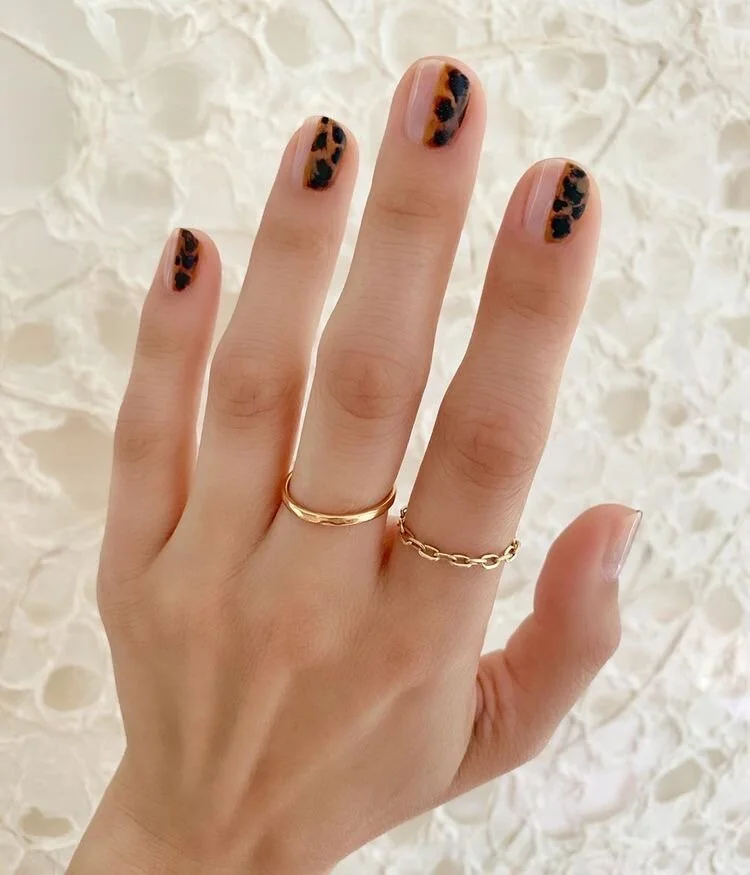
Not all of us enjoy spending several hours at the nail salon or have time for it; here’s a little step by step tutorial for you to achieve the perfect nails look from the comfort of your own house. Here is also some inspiration, in case full nails would be too over the top for you, this is how creative you can get with just this one style.
ALL PRODUCTS and items AFFILIATED TO THIS ARTICLE, OR THIS SITE IN GENERAL, ARE PLANT-BASED AND CRUELTY-FREE.


Step By Step Tutorial for Tortoise Nails
STEP 1: PREP YOUR NAILS
Cuticles
Wash your hands and dry them thoroughly, and do the same with the cuticle cutter and cuticle pusher. Soak your hands for 10 to 15 minutes in a bowl filled with warm water to soften your cuticles (or you can simply clip your cuticles after the shower). Now, using the cuticle pusher, slightly push your cuticles to raise them and prep them to be cut off. Get your cuticle cutter and carefully trim excess skin with little snips - stay cautious to not cut off any living skin.
To avoid irritation, apply some cuticle oil (don’t skip this step!).
Shape
Using a nail file, shape your nails to your liking - ballerina, round, oval, square etc.
Buff
Once you achieved the shape desired, you need to gently dull the surface of the nails so the polish adheres better and therefore, last longer with the help of a buffer - don’t forget the sides of the nails as well as the base of it, this is the most likely areas for the nail polish to lift.
STEP 2: PRIMER
Apply a layer of base coat and wait for it to fully dry or place in the UV or LED machine if you are using gel.
STEP 3: COLOR BASE
To get to the tortoise effect we want to achieve, you need to use a dark orange shade as a color base. Apply two even layers of it on each of your nails (or where you want the tortoise effect, for example only at the tips if you want a French tips tortoise style).
STEP 4: TEXTURE
This step may be the most challenging, but here’s where the magic happens. For this step, you’ll need a brush, some nail polish thinner, two different shades of browns (a light brown, and a chocolate or dark brown), a little container or even some aluminium foil to mix the polish and thinner in, a black nail polish, a top coat, a good hand moisturizer, and optional but festive, a gold nail polish for added details.
- Mix together two drops of the light brown nail polish with a drop of nail thinner (two if it remains thick depending on the nail polish texture) with the help of the brush.
- Using the very same brush, apply just a little bit of the mixture on it and start laying down in a different areas of the nail a couple (2-3) drops of the diluted mixture: they will become the tortoise spots, so distribute them on the surface of your nail(s) thinking of the final result.
- Once the first layer has dried, mix together the darker shade of brown, the same way you did for the light brown, et repeat the exact same steps. Then, apply the diluted darker polish on the same spots as you did before: they should naturally (due to the nail polish thinner) not fully take the same shape but remain similar and on top and close to the previous spot(s).
- Once the darker spots have dried too, add a thin layer of black nail polish in the center of the spots - if you find it too thick or too dark, you can dilute it with some thinner as well to obtain a more natural result.
- If you want to add some gold details, lay down very little amount of gold polish here and there.
STEP 5: TOP COAT
Wait for all your nails to be completely dry, and apply a last and thin layer of top coat over the entire surface of your nails. This step will even your nails and bring out some shine and light reflection whilst protecting your nails and nail art.
STEP 6: HYDRATE
Once the top coat is fully dry, wash your hands and don’t forget to hydrate with a highly nutritive hand cream; you can also re-apply some oil cuticle if you feel that they might be irritated, and massage the oil into the base of your nails and on the skin around.